













While many families choose to visit national parks or amusement parks or exotic locations during winter break, staying at home to enjoy leisure time also offers a pleasant and relaxing experience. For me, winter break was a great chance to deepen my interests in pottery.
I also sculpt as a personal hobby — fridge magnets and small desk ornaments — and add decorations in my school projects using air-drying ultra-light clay. However, it lacks the choice of colors, dries too quickly and has lots of cracks when it dries, which means that it is hard to create more detailed products.
Over winter break, I found a bag of stone clay that I purchased two years ago, incorrectly thinking it was ultra-light clay. Since I had a lot of free time, I decided to try something new.
I planned to make two chibi-style (cute and less detailed) characters, Mydei and Phainon, from the video game “Honkai: Star Rail.”
I found online tutorials for using stone clay.
Surprisingly, the materials, procedures and tools of stone clay were much more complicated than ultra-light clay: On top of the most basic shaping, there was also sanding, painting and sealing involved.
First, I molded the clay into a slightly-flattened sphere with indents for eyes to form the head. I formed a trapezoid with rounded corners for the body, connected by a half of a toothpick, as the head was too heavy to stay in place by sticking alone. Next to me, I was referencing a photo of Mydei to create his hair.
Even though shaping each individual hair strand required continuous and meticulous adjustments, which led to the appearance of some fissures, I figured out that I could smooth out the cracks with a small amount of water, brushing on the surface of the clay. After adding each hair strand to the head, I blended the surface to remove seams with fingers and toothpicks.
It took a whole day of waiting for the clay to completely dry, so I made the clay base of the second character along with some accessories. These included a crown and a sword that could be assembled on the main body with magnets.
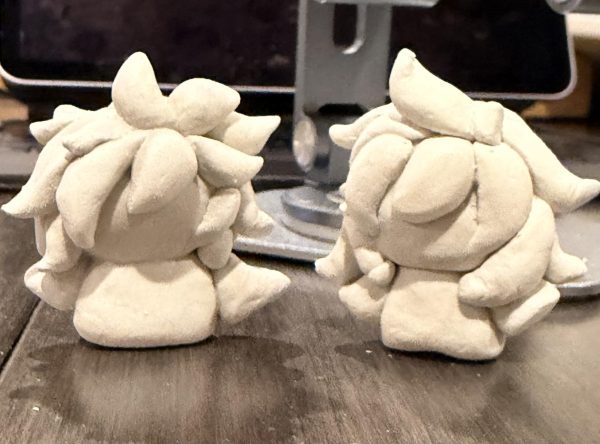
At the end of the first day, I had finished two clay bases. On the second day, I started sanding and painting.
After knocking on the clay and hearing the crisp sound — which signaled it was dry — I sanded the surface of the clay with a nail file. Then, I painted them with acrylic paint with two layers of white for the whole piece, waiting 30 minutes between each layer so that the final color could be perfectly shown.
Usually, in order to ensure neatness, the portion of hair and face should be colored separately before assembly; but I didn’t notice as it was my first try. Instead, I colored the face and body first, as they were under the hair — I figured the color of hair would cover any overflow. Still, I waited half of an hour for each kind of color to dry and before continuing.
I decided to seal the small accessories by evenly applying a mod podge coating with small brushes. So, the second day of making stone clay ended with one fully painted main body and sealing of the accessories.
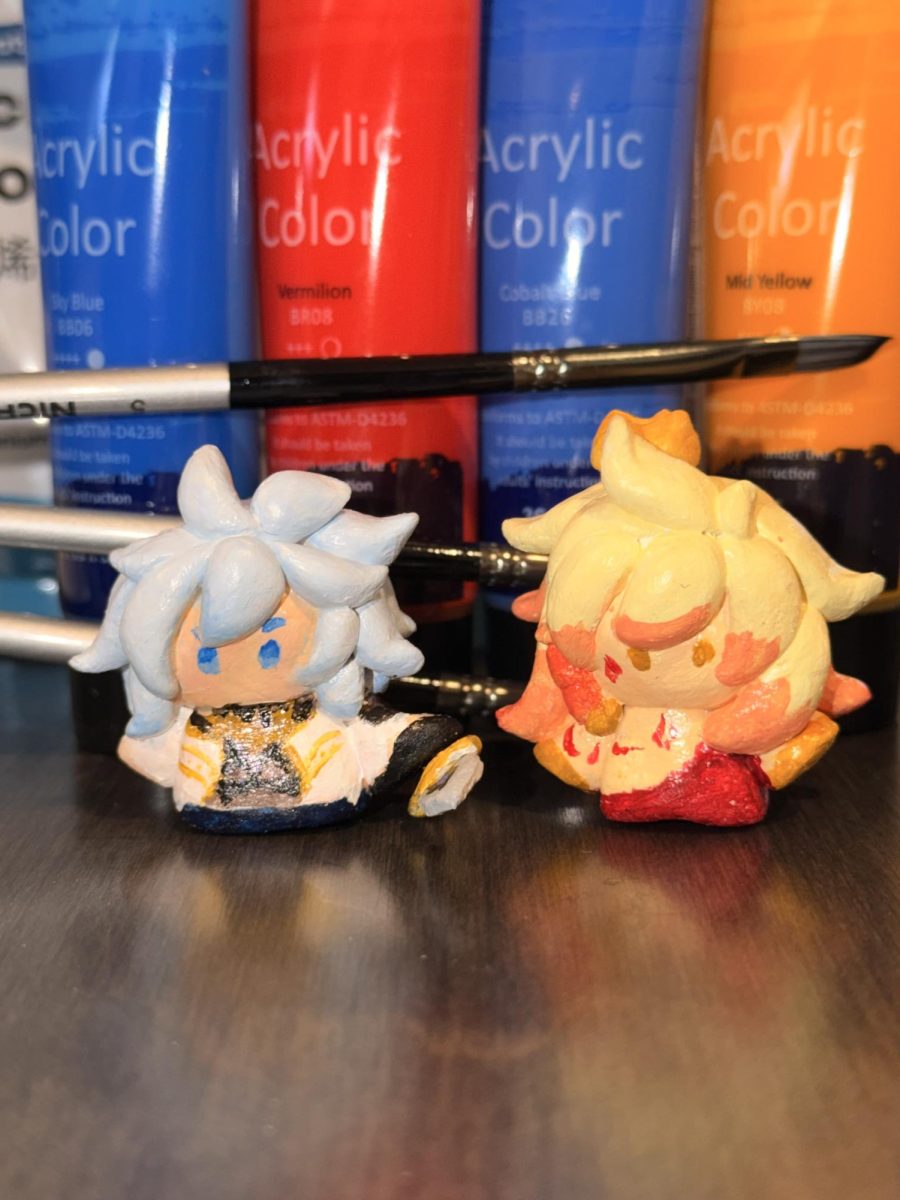
On the third day, I repeated the same steps, checking the effectiveness of the sealing that smoothened the clay’s surface and protected the color under it. I finally got two cute figures that were about one and half inches tall.
In the end,I found the results so successful that I continued to create other projects, like a tea set for my dad’s birthday gift. Compared with air-dry clay, I loved how stone clay enabled me to create more delicate products with its smooth and flexible properties. I enjoyed the leisure time of designing and creating with clay, achieving the sense of accomplishment at the same time.